Natural Brushes
When the first lockdown began, I came up with a plan to do an art project everyday with my son, who was three years old. I documented this on my personal instagram account and we got to day fifty-seven before I gave up keeping track. We made paper, did suminagashi, orizomegami and so much gelli printing. I found that many projects that seem complex can be simplified even for a toddler and we did a lot of learning together. The project that we came back to again and again was mark-marking because he loved playing with paint. We stamped with cardboard and vegetables, made dinosaur footprints and rolled toy cars through paint.
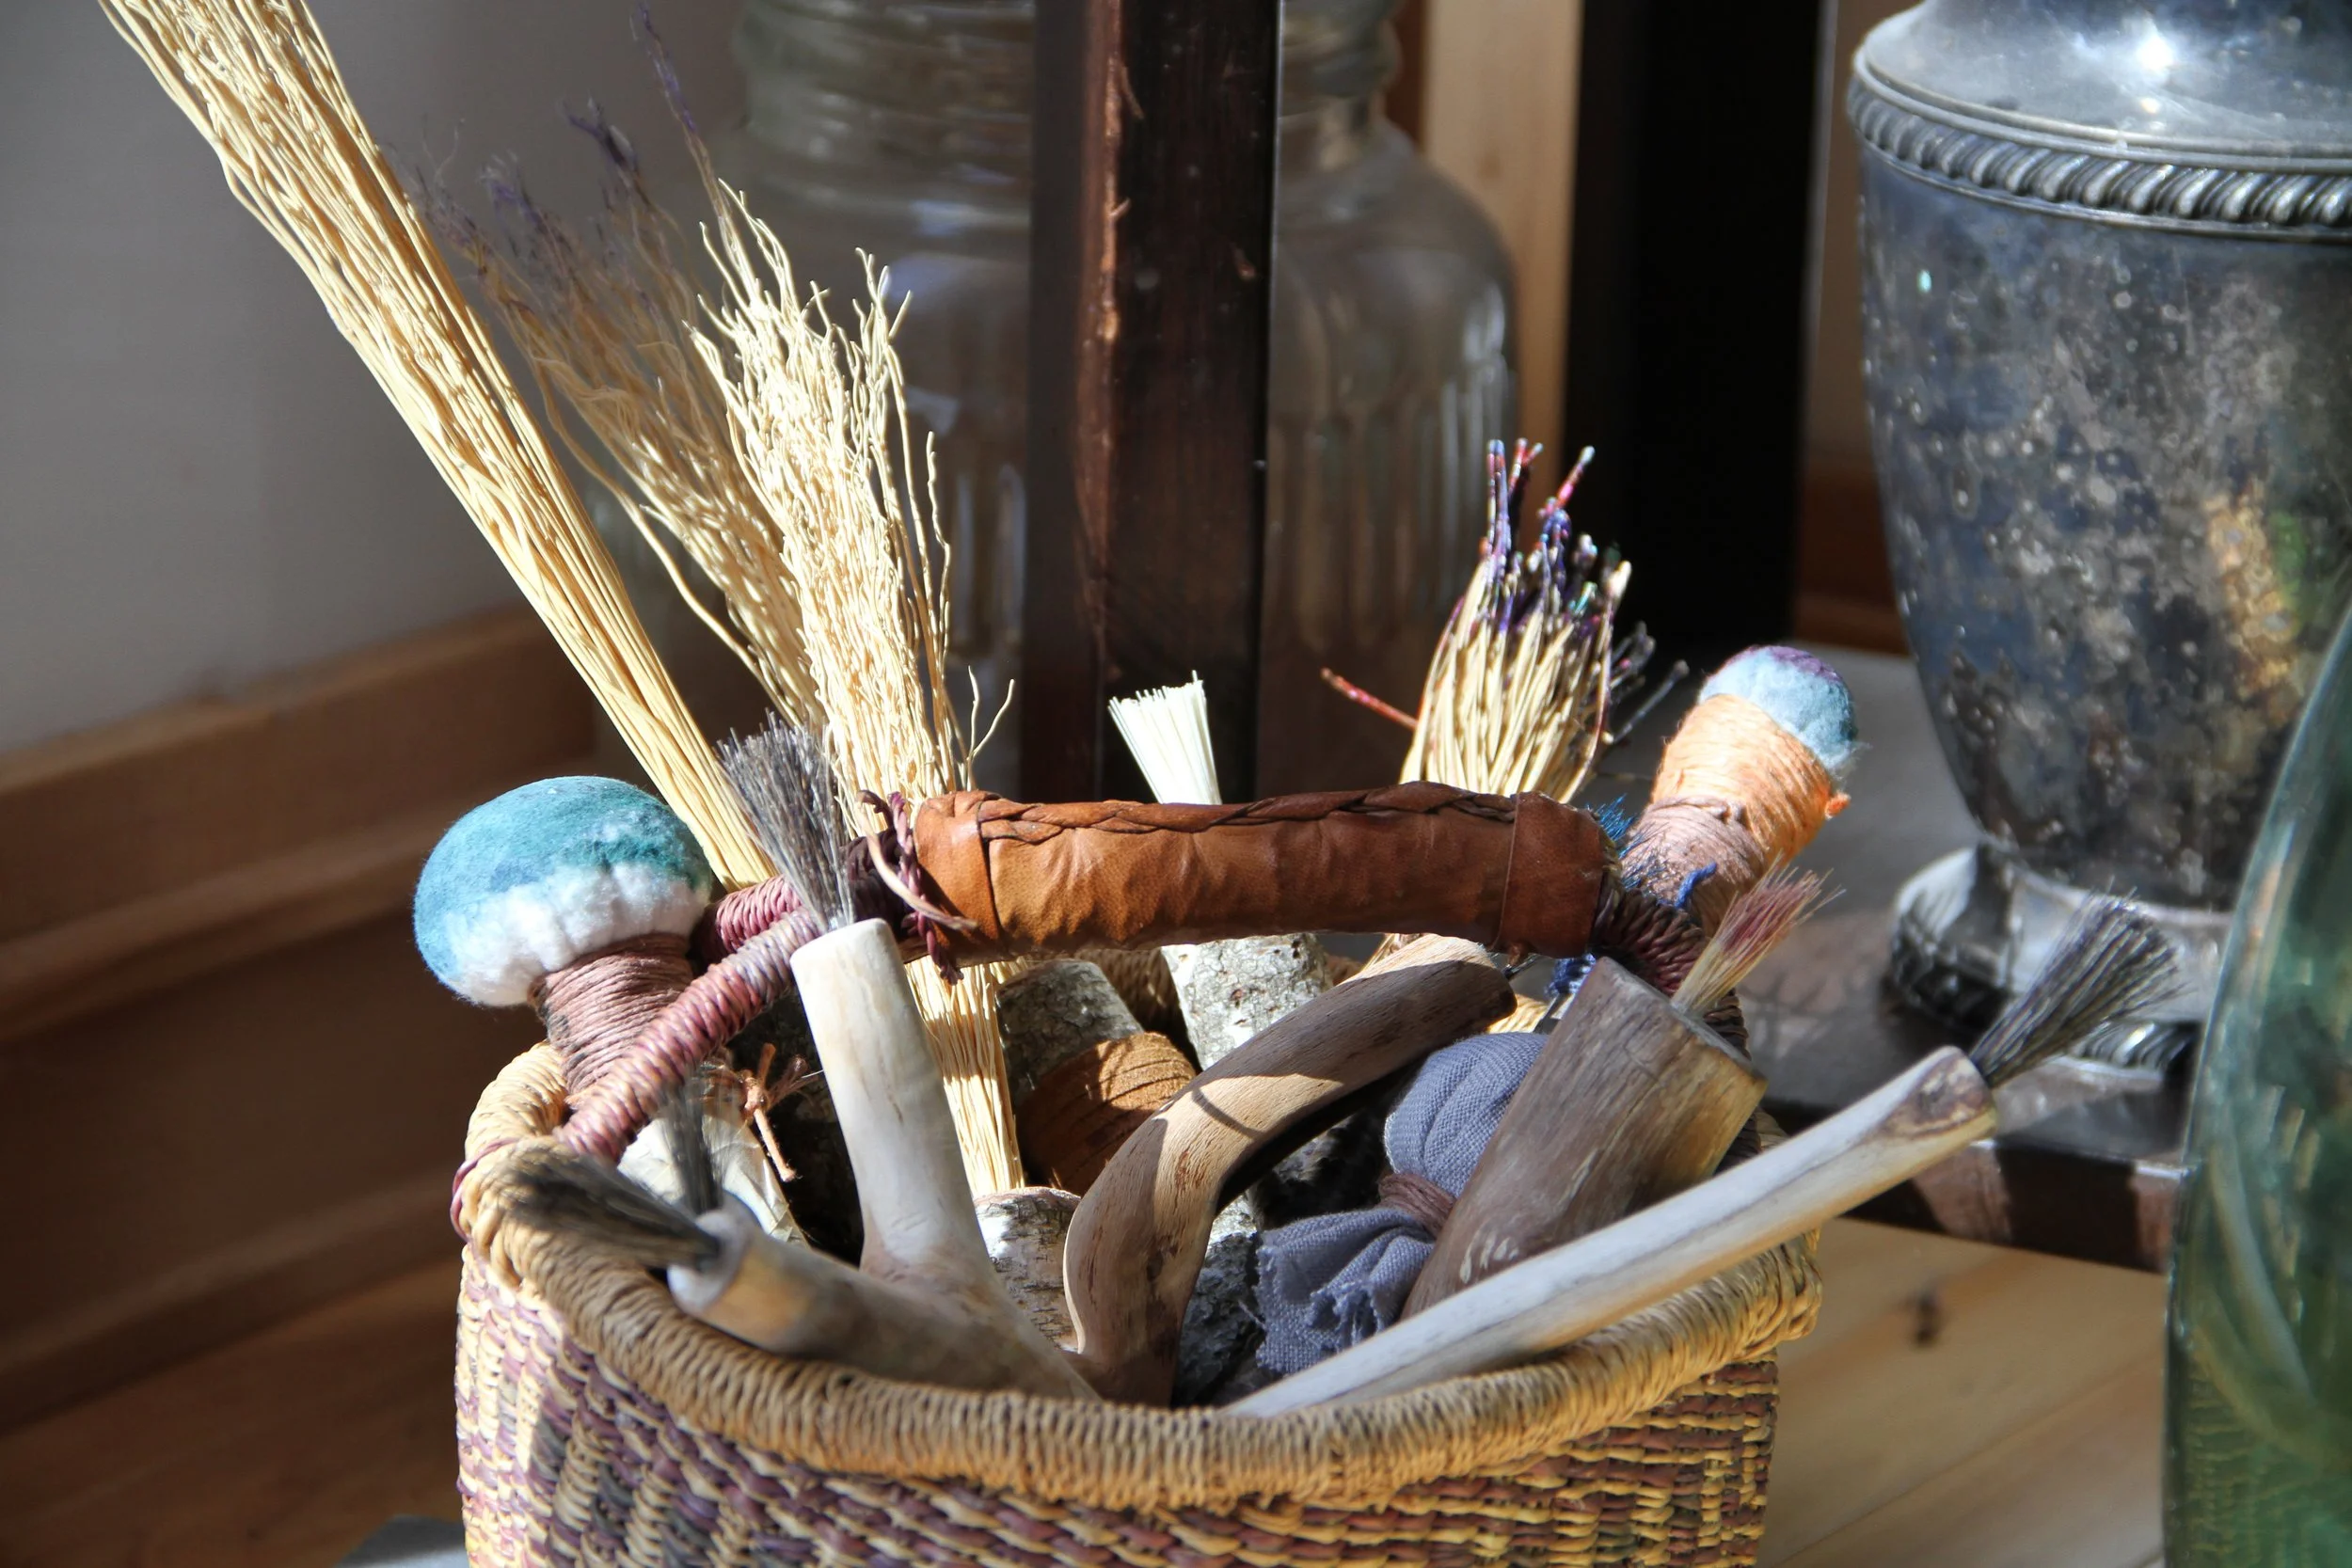
One of the most successful projects was the natural mark making tools we made. We would wander around the woods and collect pine needles, grasses, leaves and mosses that we’d attach to sticks with rubber bands. They weren’t particularly pretty to look at, but it was a fun project when we really needed things to do. The pine needle brush turned out to be long lasting, and we still use it.
I have normal paint brushes, but I never use them. In fact, I have two neatly labeled jars, one for acrylic brushes and one for watercolor, and I’ve used one brush from each of the sets. I prefer to scrape, stamp and make marks with whatever tools I can scavenge and make. In my basement studio, there is a large box filled with odd and ends of natural and man-made objects that, unlike those paint brushes, are covered with paint.
Another tool I like to use are cola pens, which I learned about by reading Shelly Rhodes’ book Sketchbook Explorations. These are tiny tools made by snipping aluminum cans into small squares, then folding them to create ink wells that are secured with tape to coffee stirrers. The marks they make vary depending on how the material is shaped. I can scoop up a dab of ink and make interesting marks.
A few months ago, I took Leslie Rottner’s brushmaking class on the Jean Oliver network. I’ve taken Rothner’s two other collage classes, and finally had the time to commit to this one. It’s a good one and if you have any interest in mark marking and working with handmade tools, you’ll want to give this one a try.
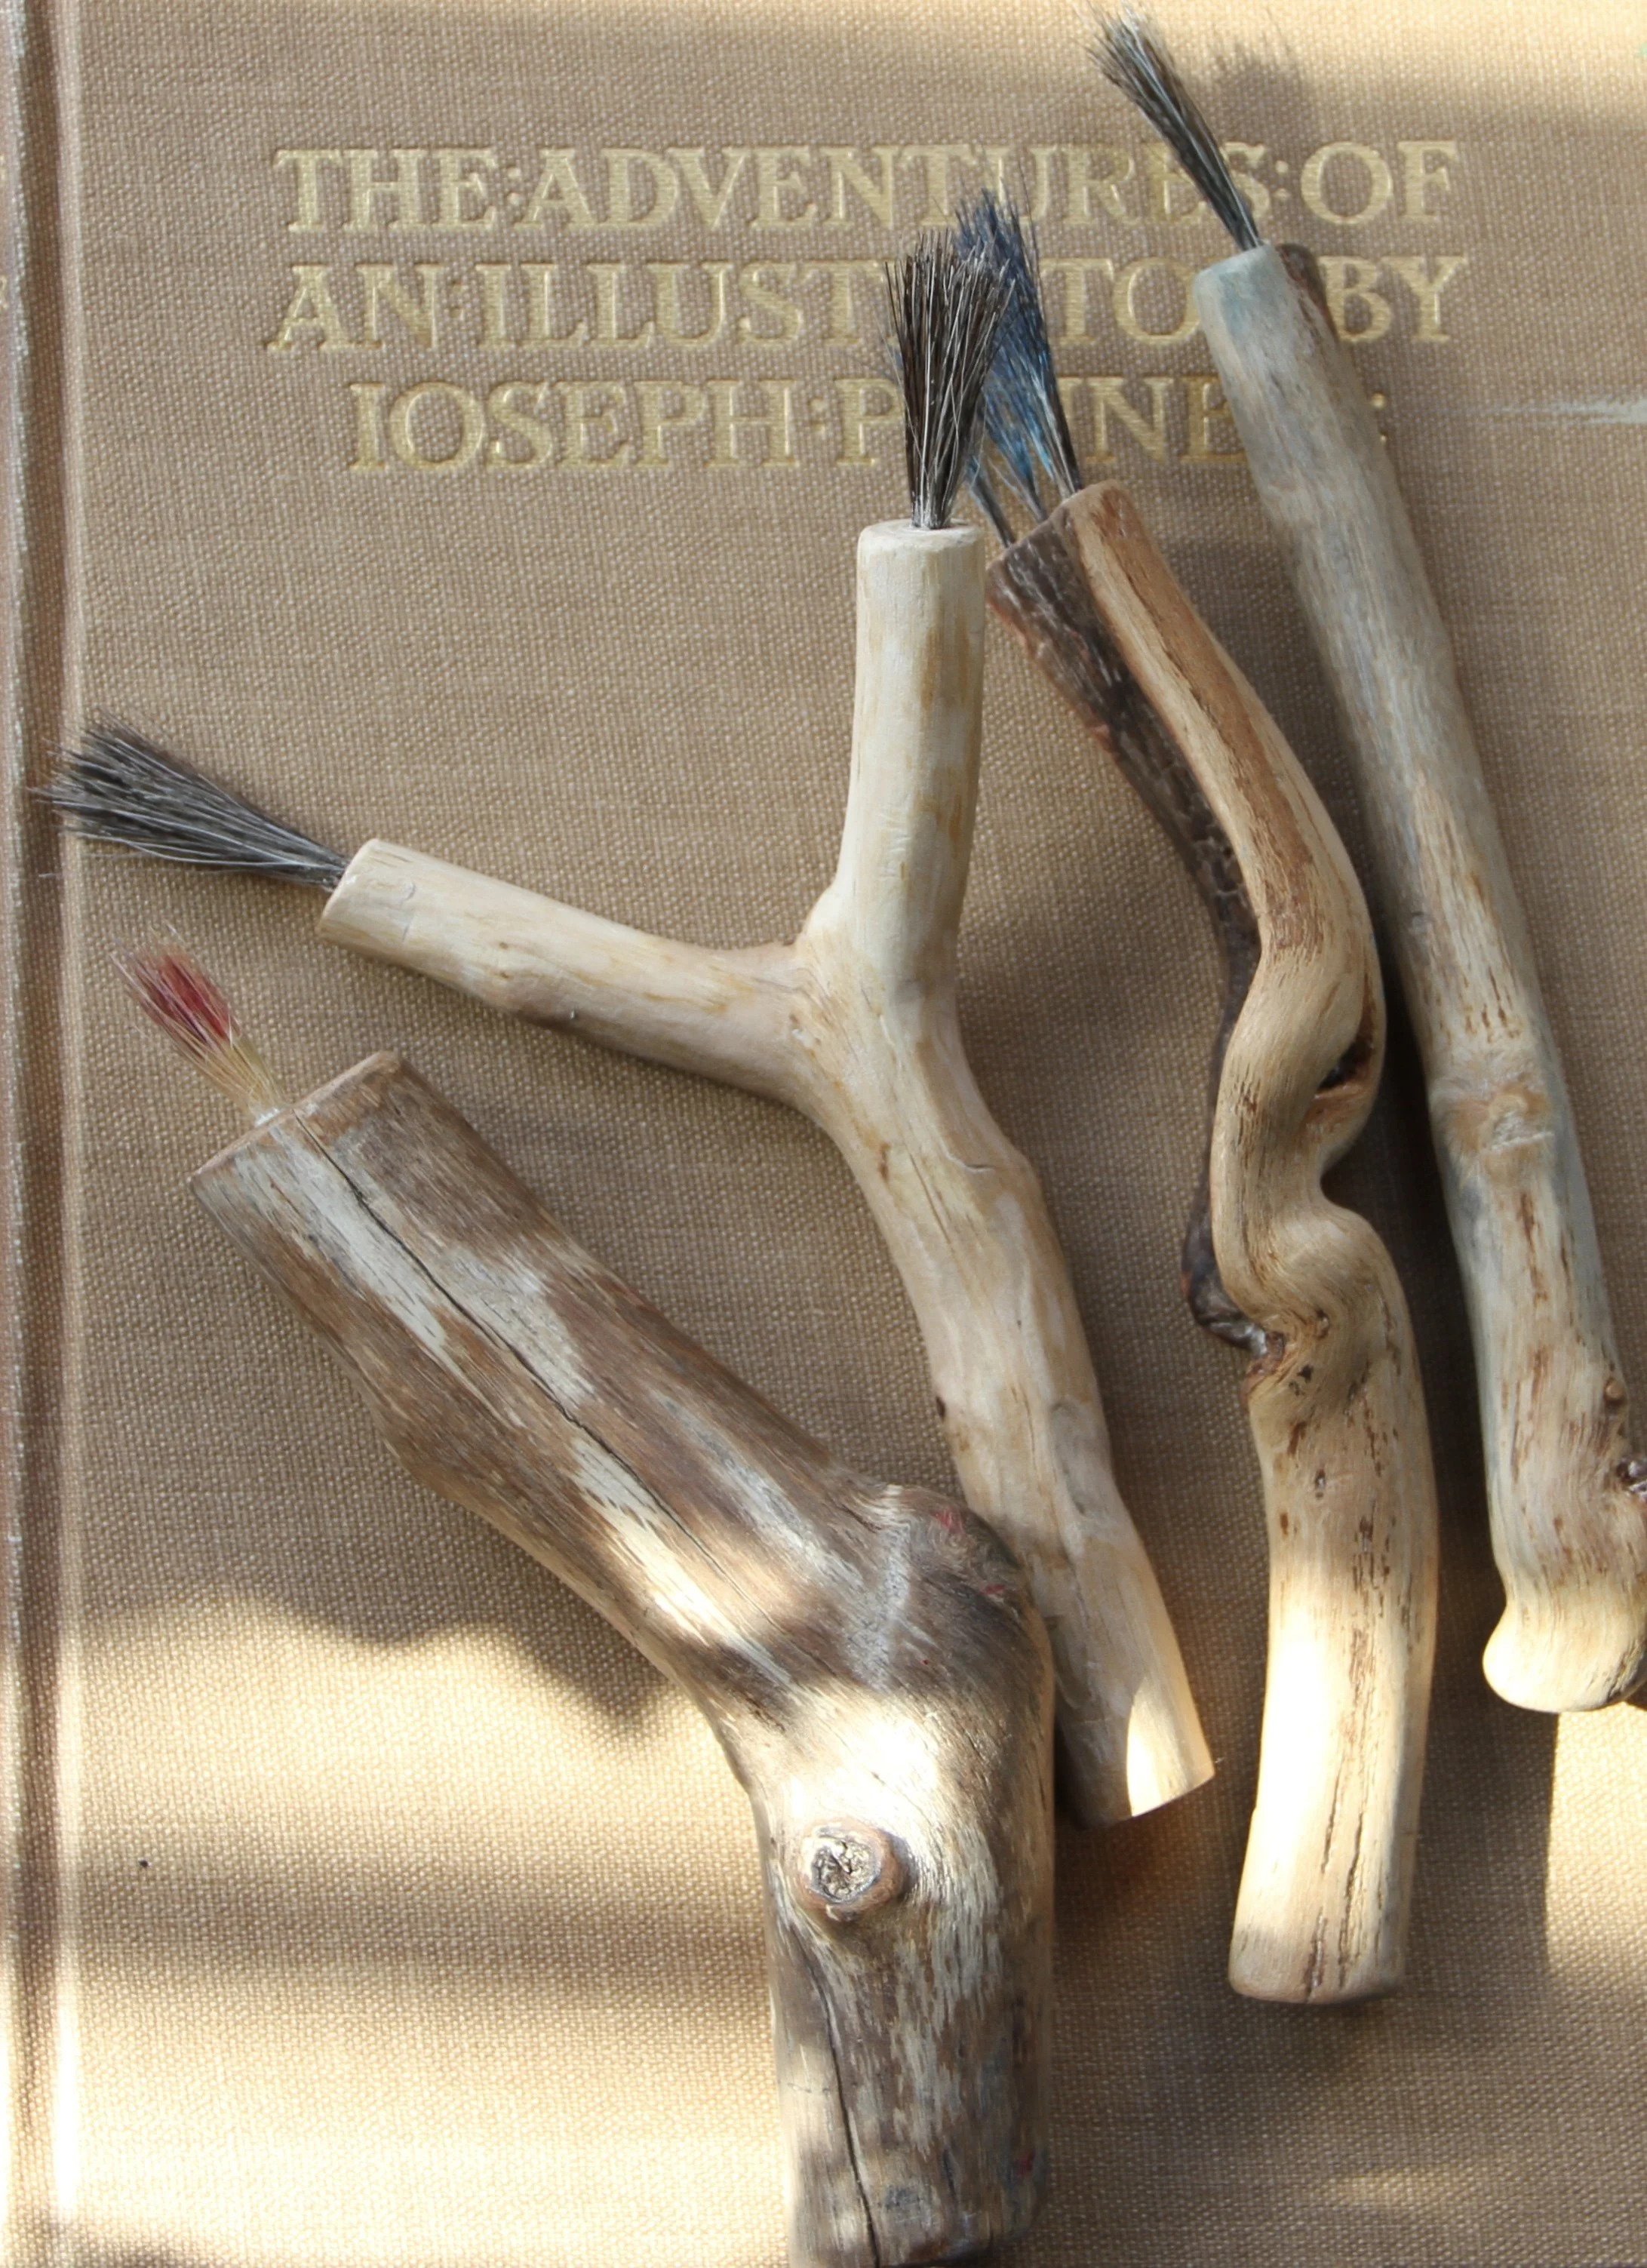
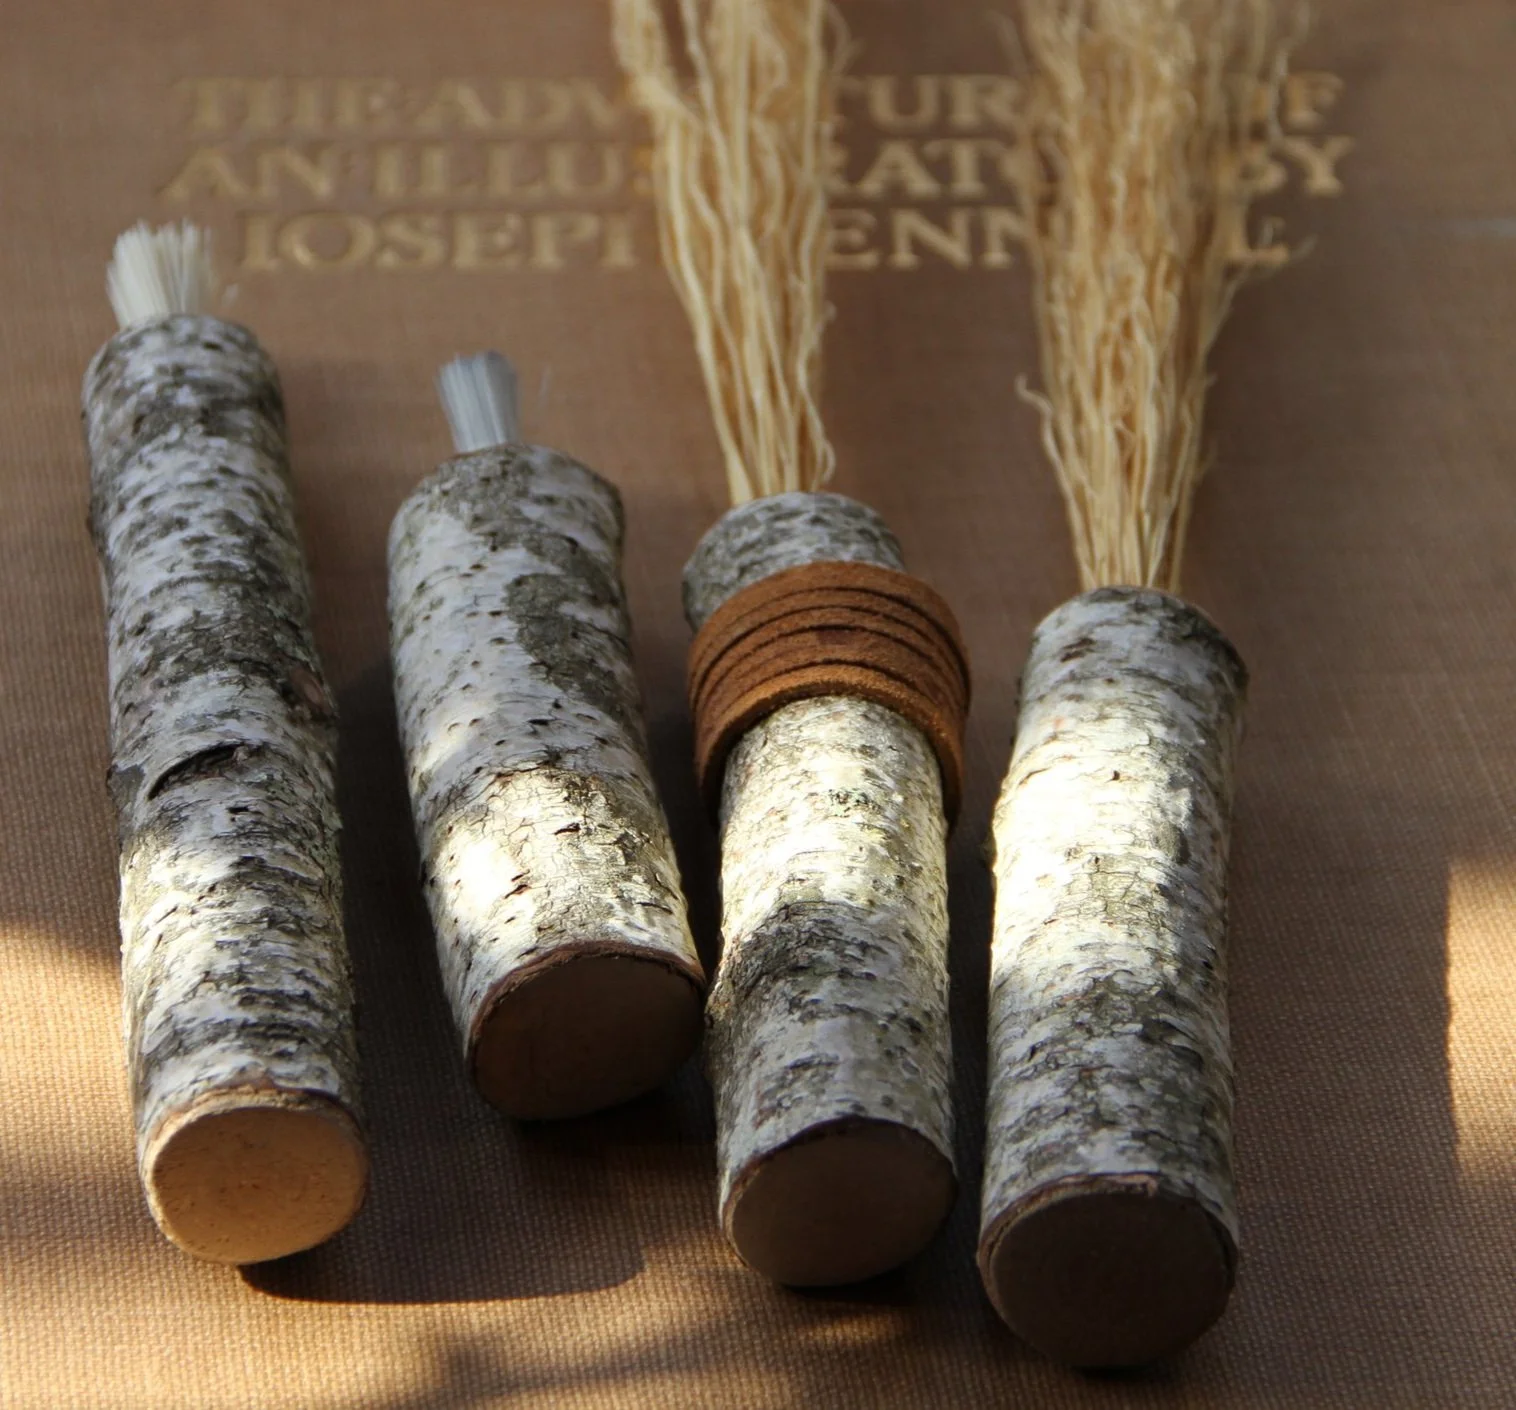
Rothner’s class involves instructions for two types of brushes. One style is similar to my first attempts where the materials are taped and wrapped to the ends of sticks. The majority of the class is on a brush style that takes quite a bit of effort but with wonderful results. I find interesting branches and, following her detailed instructions, remove the bark, sand, wax, drill and adhere repurposed bristles to create something new.
When I use my handmade mark making tools, the results are always surprising and create painted papers with a natural, organic look. I’ll often layer marks from different brushes on the same piece of paper to create depth and interest. These are some of my favorite papers to use in my collages.
An Instagram friend pointed me towards the work of Lorna Crane and I made some of her fabric brushes. She uses balled up fleece and fabric that is attached to branches. These create beautiful stripes and dots. I’ve added her class on mark making to my list of classes that I need to take because I’m sure there is more to learn.
I’ve created a curated Pinterest board of additional ideas for hand made brushes and tools for even more inspiration. On my Instagram page, you can find a few Reels where I demonstrate some of these brushes.